Collecting and Applying Pre-Payments and the Pre-Payment Report
Sections
- Collecting a Pre-Payment
- Applying a Pre-Payment
- Deleting an applied Pre-Payment
- Using the Pre-Payment Report
Patient payments can be collected as Pre-Payments within Patient Accounts and applied to one or more services. This Knowledge Base article will guide you through the process of collecting and then applying a pre-payment, as well as using the Pre-Payment Report.
Collecting a Pre-Payment
From the Chart Room, start by click on Patient Accounts
Then search for a patient (you can search by first and/or last name, patient ID, or account ID)
In Patient Accounts, click to Collect Pre-Payment 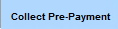
The Collect Pre-Payment window will open
- Payment Date, this populates automatically
- Payment Amount
- Site Location
- Clinician
- Description (optional)
- Check Number (optional/if applicable)
- Source of Payment
- Payment/Adjustment Code (optional)
- Done/Cancel
Example Pre-Payment:
The collected Pre-Payment will populate as a line item within Patient Accounts, highlighted in green. The description will maintain the original payment amount.
Applying a Pre-Payment
Once one or more Pre-Payments have been added to the patient’s account, they can be applied to a service. Start by locating the service to apply the Pre-Payment to and clicking the pencil icon to edit
With the Edit Service window open, highlight the service code to apply the Pre-Payment to, then go to the Code: XXXXX Specific tab. Click Add Patient Pmt 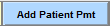
In the New Patient Payment window, click to Use Pre-Payment 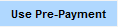 Applicable Pre-Payments will be itemized.
Type in the amount of the Pre-Payment you wish to apply in the Apply text box then click Apply.
Once applied, you will be returned to the New Patient Payment window. Click Done to save and return to Patient Accounts
The Pre-Payment is now applied as a patient payment to the service. Click Done to return to Patient Accounts
In Patient Accounts, the Pre-Payment line item will update to show the remaining balance (the description will retain the initial payment amount). Once a Pre-Payment has been exhausted, the line item will no longer be highlighted in green in Patient Accounts, and the remaining balance will display as 0.00
Deleting an applied Pre-Payment
Once a prepayment has been applied to a service, it can be deleted if it was applied in error.
Please Note: If the original Prepayment entry has been deleted and some or all of the Pre-payment needs to be deleted it will not populate as a new Pre-payment.
To delete an applied Pre-Payment, click the red X in the Edit Service window. Either on the All Payments For Note tab or the Code: Specific tab.
You will encounter a prompt to verify that you want to delete the payment and that it will be returned to the original Pre-payment. Click Delete to proceed to delete, or cancel if you do not wish to proceed.
You will see the amount of the deleted payment returned to the Pre-payment. This amount can then be applied to other services in the account if desired.
You can also delete the service charge and associated payment by clicking the red X for the line item in the Patient Account
As in the Edit Service window, you will encounter a prompt to verify that you want to delete the payment and that it will be returned to the original Pre-payment. Click Delete to proceed to delete, or cancel if you do not wish to proceed.
Using the pencil icon for the Pre-payment, you can review all payments that have been applied to services and/or returned to the Pre-payment.
If you would like to delete the Pre-payment, you are able to do so by clicking on the red X.
You will encounter a prompt to verify that you want to delete the Pre-payment and the associated payments listed.
The paid amounts will remain in the services to which they have been applied. If you want to delete an applied payment from the deleted Pre-payment, you will be able to but there will be no Pre-payment for the amount to return to.
Using the Pre-Payment Report
ICANotes users can run the Pre-Payment Report from within Patient Accounts. At the bottom right corner of a patient’s account, click the Prepayment Report button 
The Prepayment Report window will appear, allowing you to specify your search criteria
1. You can search for all Prepayments for the specified patient (or all patients), Exhausted Prepayments, or Prepayments With a Remaining Balance
2. Patient first and last name will populate with the patient whose account you are currently viewing. To change to another patient, or to search by all patients, click the gray X to clear
3. Optional, specify a start and end service date
4. Click Continue
Applicable search results will display in the report
Click on the Services This Day 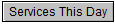 to see all applicable services with the same Date of Service in Patient Accounts
When finished, click Close to return to Patient Accounts.
Related Articles
Promoting Interoperability Meaningful Use Stage 3 for Medicaid 2020
This guide offers you explanations, links, and workflows you can use to report for Meaningful Use Stage 3 for Medicaid 2020. REPORTING PERIOD AND REQUIREMENTS The reporting period for 2020: Objectives: Any consecutive 90 days in 2020. Clinical ...