In the meantime, the Event Details window will update to reflect "Copay Requested".
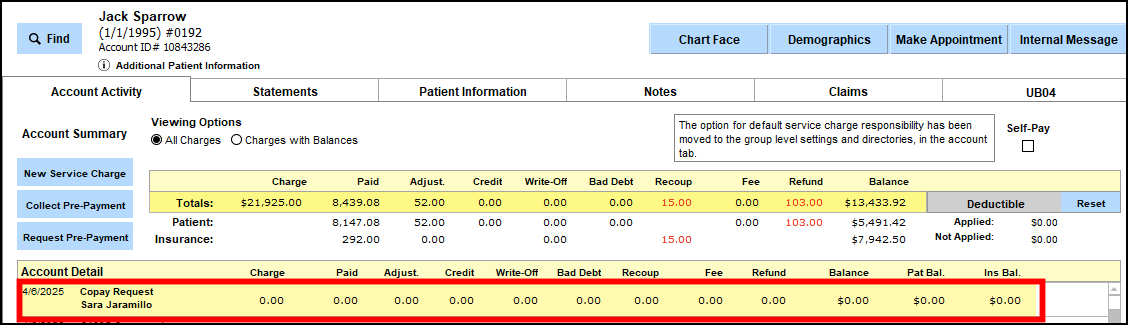
The request will likewise reflect within Patient Accounts via a single line item denoting Copay Request.
Once received, the client will follow the link contained within the message to make their payment. Please note: payment request links will expire after 24 hours.
The site will display the name of the facility where the request is being made from.
In the next screen, the client will be presented with the option to pay via Apple Pay or Google Pay (depending on their device) or to enter their card information to complete payment. If the client has stored their card information within Apple Pay or Google Pay (for a request sent via text message) they need only click on that option to proceed with payment. Otherwise, they will fill in card details.
Once entered the client will click to Pay $(amount) and will receive a confirmation message once successfully processed.
From here the client may close the tab/window from their device.
Back in ICANotes Patient Accounts, the line item for the Copay Request will update to reflect successful processing of the payment.
Click the pencil icon located to the far right of the line item to view the Edit Service window and transaction details.
If at this point no note exists yet for the service, the copay will remain as it's own line item until a note is created and the service charge added to Patient Accounts.
If a note for the service has been created but has not yet been added to Patient Accounts, within the Edit Service window you can click to Attach Finished Note.
Then on the next prompt to Please verify you want to attach this charge to a note... select Continue, then select the appropriate note for the service.
When the copay has been reconciled with the accompanying note, the payment will display under All Payments For Note in the Edit Service window:
Similarly you may view individual payment information in the Code (Specific) tab by clicking the pencil icon.
Transaction information for the Stripe payment will display within the Description field:
Clicking the (i) icon to the right of the Description field will likewise display further transaction information, such as the invoice number:
Click outside of the field to close this pop-out, then click  to return to the Edit Service window. From there you can click
  to return to the main Patient Accounts screen.
In the Calendar, Event Details for the appointment will now reflect that the copay was collected and to Check Patient Accounts for details.
2. Request Pre-Payment via Patient Accounts:
To request a pre-payment in Patient Accounts, start by clicking to Request Pre-Payment.
In the New Pre-Payment Request window, fill in all applicable details for the payment request, including Amount, Site, Clinician and Description. Description is not a required field to send the Payment Request.
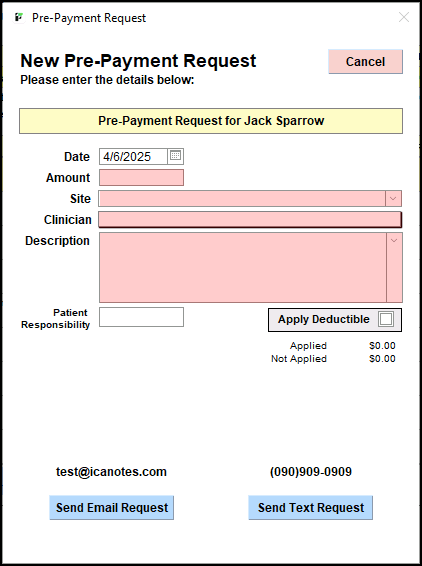
Once all details are filled in, click to either Send Email Request or Send Text Request. If either the email or mobile phone number are missing in Demographics, the respective button will be greyed out and unclickable.
The client will receive the payment request to either their email inbox or mobile phone via text message - depending on your choice. Here is an example of the email payment request:
The client will click/tap the link contained in the request to proceed with payment.
On the secure Stripe site, the client will complete their billing details, including Card information, Name on card, Country/region and Zip. The Email field will pre-populate if 'Send Email Request' was chosen from Patient Accounts. The amount being requested will be listed on the left-side of the screen, as well as the name of the facility; this will be set based on the Site location assigned to the note/service charge within Patient Accounts.
Upon completing all information and clicking the Pay button, the client will receive confirmation that the payment has been made.
3. Request Payment via the Edit Service window in Patient Accounts:
To request payment on a service that exists in Patient Accounts, start by clicking the pencil icon on the appropriate line item.
Within the Edit Service window, click on the Code specific tab, then click the  button to Request Payment.
In the Payment Request pop-up, fill in the Amount and Description, as well as any additional information such as Payment/Adjustment code and Patient Responsibility, as needed. You can also use the Enter Copay button if needed (and if a copay is set in Demographics). Description is not a required field to send the Payment Request.
Once all needed details are filled in, click to either Send Email Request or Send Text Request. The email and mobile phone number feed from Demographics.
Upon clicking one of the available options you will receive a prompt confirming the payment request has been sent to the client.
The client will receive the payment request to either their email inbox or mobile phone via text message - depending on your choice. Here is an example of the email payment request:
The client will click/tap the link contained in the request to proceed with payment. On the secure Stripe site, the client will complete their billing details, including Card information, Name on card, Country/region and Zip. The Email field will pre-populate if 'Send Email Request' was chosen from Patient Accounts. The amount being requested will be listed on the left-side of the screen, as well as the name of the facility; this will be set based on the Site location assigned to the note/service charge within Patient Accounts.
Upon completing all information and clicking the Pay button, the client will receive confirmation that the payment has been made.
Meanwhile, as you await payment from the client, you can view payment requests directly from within the Edit Service window in Patient Accounts. Within the Code specific tab, you'll notice the letter R next to the Request Payment button.
Clicking this option will display a pop-up displaying all Payment Requests made to the client for the selected service. If the link is expired, the payment request will no longer be active. Only active Payment Requests will populate in this area.
Once the payment is made by the client, it will automatically sync back to ICANotes with Patient Accounts and display as a patient payment in both the All Payments For Note and Code specific tabs.
Once paid, the service Description will update to contain the transaction information:
Likewise, clicking the pencil icon on the specific client payment will display transaction information from the collected payment:
Click the (i) icon to view more details.
Frequently Asked Questions:
Once a request is sent, how long will the client have to make the payment before it expires?
The payment request link will expire after 24 hours, at which time you will have the option of deleting the record of the Payment Request in Patient Accounts by clicking the red X icon to the far right of the request in the line item detail. This will allow you to remove expired requests and replace them with a more recent Payment Request.
How can I request payment if I used the Request Payment From the Calendar and the request expires?
The link in the Calendar Event Details will not allow another request to be sent from the Calendar. Follow the workflow used to Request Payment From Patient Accounts for an existing charge, if the charge is present, or as a pre-payment if there is not a charge present.
Why are some charges highlighted Patient Accounts?
Service line items with a yellow highlight indicate pending Stripe Payment request that is currently active. Once all of the requested payments have been made, or 24 hours have elapsed causing the request to be cancelled, the highlight will no longer be present.
How can I see an overview of my payment requests and track payments versus non-payments versus requests actively pending payment?
This information will be available external to ICANotes, on the Stripe Dashboard. Log in to your account and select the Payments option from the menu on the left-hand side. This will allow you to view Payment information for Succeeded, Refunded, Uncaptured and All.
How can I review payment requests that were not paid in 24 hours?
This information will be available external to ICANotes, on the Stripe Dashboard. Log in to your account and click on the three dots to the far left on a Cancelled Payment to view the details of that transaction. The details regarding cancellation of payments will be under the Timeline heading.